

Yes, you can absolutely use solar lights indoors, and it’s easier than you think. The key is understanding how to charge them properly and where to place them for maximum impact. While solar lights are designed to soak up sunlight outdoors, they work beautifully inside as long as you charge them near a sunny window or rotate them outside periodically. This budget-friendly lighting solution offers homeowners and renters a cord-free, energy-saving way to add ambient glow to bedrooms, closets, hallways, and accent corners without calling an electrician or drilling holes.
Indoor solar lighting has come a long way in 2026. Modern units deliver surprisingly bright illumination, often comparable to low-wattage LED fixtures, and they’re available in styles that range from sleek and minimalist to rustic and decorative. The real appeal? Zero electricity cost, total portability, and the freedom to light spaces where traditional wiring would be impractical or expensive. You can transform a dim corner, add soft lighting to a reading nook, or create a cozy bedside glow in minutes.
The process involves selecting the right type of solar light for your space, ensuring it gets adequate sunlight exposure for charging (typically four to six hours), and positioning it where you need light most. With a handful of affordable tools and a little strategic planning, you’ll have a functional, stylish lighting setup that blends practicality with design-forward thinking. This guide walks you through every step, from choosing materials to troubleshooting common performance hiccups, so you can confidently bring solar power indoors.
What You’ll Need to Get Started
Getting started with indoor solar lighting doesn’t require a major investment or a toolkit full of specialized equipment. The essentials are straightforward, and you probably already have some of these items around your house.
The most crucial decision is choosing the right type of solar light for indoor use. Panel-separate models, where the solar panel detaches from the light fixture via a cable, offer the most flexibility since you can position the panel in a sunny window while placing the light anywhere within cable reach. Window-mounted solar lights with integrated panels work well for spots where the light itself can sit directly in sunlight, like windowsills or glass doors. Portable solar lamps give you complete freedom to move lighting around, though they’ll need regular trips to sunny spots for charging.
For installation and placement, you’ll need a few basic supplies:
- Suction cups or adhesive hooks rated for window mounting (check weight limits)
- Command strips or removable adhesive for renter-friendly installations
- Extension cords if your panel-separate system needs extra reach
- Measuring tape to calculate sun exposure and placement distances
- Microfiber cloth for keeping panels clean and efficient
Beyond the basics, a few optional accessories can significantly boost performance. Light diffusers or frosted lampshades soften harsh LED output and create more ambient lighting that feels less utilitarian. Small mirrors or reflective surfaces positioned near solar panels can increase the amount of light hitting the cells, especially useful in winter months or rooms with limited direct sun. White poster board works just as well if you’re keeping things budget-conscious.
You might also want a smartphone light meter app (many are free) to measure sunlight intensity in different window locations throughout the day. This takes the guesswork out of panel placement and helps you maximize charging efficiency from day one. A notebook for tracking which spots get the best sun during different seasons proves surprisingly helpful as you fine-tune your setup over time.
Understanding How Indoor Solar Lights Work
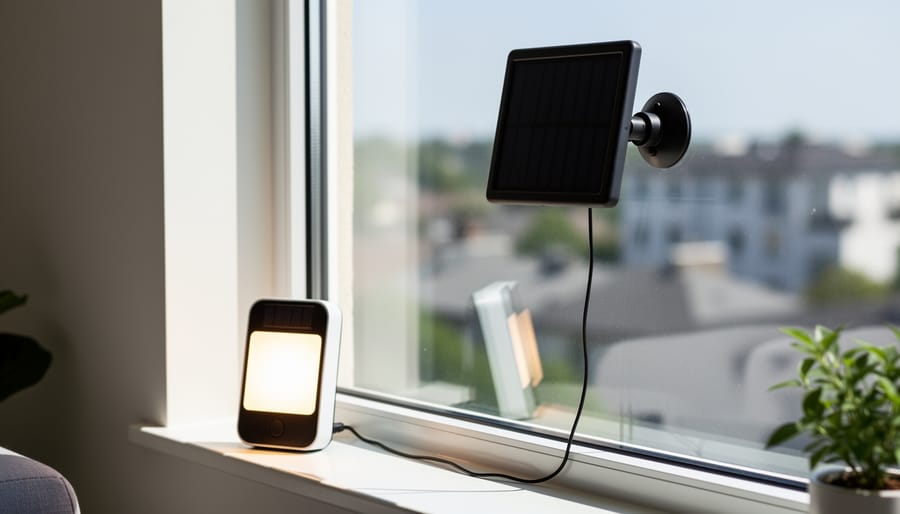
Solar lights work by converting sunlight into electrical energy that’s stored in rechargeable batteries, which then power LED bulbs when it gets dark. The challenge indoors is that windows filter out a significant portion of the UV spectrum and reduce light intensity, even a bright room receives only about 50-75% of outdoor sunlight levels, and that’s assuming direct sun exposure.
This is where understanding your options matters. Integrated systems combine the solar panel and light fixture in one unit, which works fine outdoors but limits your flexibility inside. You’re stuck placing the entire light where sun hits, which isn’t always where you need illumination. Separated panel systems let you mount the panel in your sunniest window while running a cable to position the light fixture wherever it makes sense, a closet, hallway, or corner that never sees direct sun.
Window placement dramatically affects performance. South-facing windows (in the northern hemisphere) receive the most consistent sunlight year-round, making them ideal for panel placement. East or west windows work but provide fewer charging hours. North-facing windows rarely supply enough light for reliable charging. Even with optimal placement, expect your indoor solar lights to collect 4-6 hours of usable charge on sunny days, compared to 8-10 hours outdoors.
Set realistic brightness expectations too. Indoor solar lights produce 10-50 lumens typically, perfect for accent lighting, nightlights, or mood illumination, but insufficient for task lighting like reading or cooking. They’ll run 3-6 hours after a full charge, shorter in winter, longer in summer. Think of them as supplemental, atmospheric lighting rather than primary light sources, and you’ll find plenty of creative ways to make them work beautifully in your home.
Important Safety and Performance Considerations
Before you commit to a solar lighting setup, take a few minutes to understand the safety boundaries and realistic performance limits, this knowledge will save you both money and frustration down the road.
The most critical safety concern is battery overheating. Solar lights designed for outdoor use often have batteries that can withstand temperature fluctuations, but when placed on a sunny windowsill indoors, they’re exposed to intensified heat from the greenhouse effect. On hot summer days, glass magnifies sunlight and traps heat, potentially causing lithium-ion or NiMH batteries to swell, leak, or even rupture. Check your manufacturer’s specifications for maximum operating temperatures, and if your south-facing window gets uncomfortably hot to touch during afternoon sun, move lights away from direct contact with the glass or switch to early-morning sun exposure only.
Moisture is another hidden hazard when bringing outdoor-rated lights inside. While these fixtures handle rain beautifully, indoor condensation from bathrooms, kitchens, or humidifiers can seep into seals that were designed to drain, not contain water. If you’re placing solar lights in humid rooms, ensure they have adequate airflow and aren’t enclosed in decorative containers that trap moisture. Wipe down panels and casings weekly to prevent buildup.
Understand where solar lights simply won’t deliver results. North-facing windows in the northern hemisphere receive minimal direct sun, heavily shaded areas behind trees or buildings won’t provide sufficient charge, and interior rooms without window access are non-starters unless you run extension cables to external panels. Basements, windowless bathrooms, and closets far from natural light need traditional solutions or hybrid approaches.
For budget-conscious troubleshooting, start with the simplest fixes: clean dusty panels with a damp microfiber cloth, reposition lights fifteen degrees if they’re underperforming, and rotate your fixtures seasonally as the sun’s angle changes. If runtime drops suddenly, the battery likely needs replacement, often a few dollars online versus buying an entirely new unit.
Step-by-Step: Setting Up Solar Lights Indoors
Assess Your Sunlight Access
Start by spending a day observing natural light in each room. You’re looking for windows that receive unobstructed sunlight for at least 4-6 hours daily, this is the minimum charging threshold for most solar panels to perform reliably indoors.
In the northern hemisphere, south-facing windows are your best bet. They receive the most consistent direct sunlight throughout the day, especially in winter when the sun sits lower in the sky. East-facing windows work well for morning light but fade by afternoon, while west-facing windows deliver strong late-day sun that can actually overheat panels during summer months. North-facing windows rarely provide enough direct light for effective charging.
Use painter’s tape to mark sunny spots on your windowsills or floors at different times, 9 AM, noon, and 3 PM give you a solid snapshot of light patterns. For a more precise approach, free apps like Sun Surveyor or Sunseeker show you sun paths specific to your location and time of year, helping you predict seasonal changes before you commit to placement.
Watch for shadows cast by neighboring buildings, trees, or roof overhangs that might block light during peak hours. Even partial shade significantly reduces charging efficiency, so full, direct exposure matters more than total window size.
Choose and Position Your Solar Panels
The sweet spot for indoor solar panels is direct, unobstructed window access for at least 4-6 hours daily. Start by placing panels flat on a south-facing windowsill, angled slightly toward the sun if space allows. Clean the glass thoroughly first, dirt and film can reduce charging efficiency by up to 30%.
For vertical mounting, suction-cup hangers work brilliantly and leave no damage. Press them firmly against the upper window pane where sunlight hits strongest, usually above any furnishings or curtains. Test the hold after 24 hours; temperature fluctuations can loosen cheaper suction cups.
Renters with shade issues can run extension cables from exterior-mounted panels to interior lights. Small adhesive cable clips keep wires tidy along window frames and baseboards. Some separated-panel systems offer 10-15 foot cables, giving you flexibility to charge outside while lighting a dim hallway or closet inside.
Avoid placing panels behind sheer curtains or UV-blocking glass, both significantly reduce charging capacity. If your best window faces east or west rather than south, expect 20-40% less runtime but still functional performance for accent lighting needs.
Install Your Light Fixtures
Position your lights based on their intended purpose and your room’s needs. For accent lighting around artwork or architectural features, mount solar fixtures 12-18 inches away from the focal point to create soft, flattering illumination without harsh shadows. Most battery-operated solar lights come with adhesive backing, clean the surface with rubbing alcohol first, then press firmly for 30 seconds to ensure proper adhesion.
Task lighting works beautifully in closets and hallways where wired fixtures would be complicated or costly. Install motion-activated solar lights at eye level or slightly above, roughly 6 feet high, where they’ll detect movement effectively. Use removable adhesive strips for renter-friendly installations that won’t damage walls.
For decorative ambient lighting, think flexible placement. Set portable solar lamps on shelves, mantels, or side tables where you can easily move them to windows for daytime charging. String lights with separated panels offer the most versatility, drape them across headboards, around mirrors, or along bookshelves using tiny command hooks spaced 8-10 inches apart.
Consider your charging routine. Place lights where you’ll remember to rotate them to sunny spots, or choose locations with permanent panel access if you’re using extension cables to outdoor-mounted panels.
Optimize Charging and Performance
Getting your solar lights charged is just the start, keeping them performing well takes a few simple habits that cost nothing but make a real difference.
Clean your solar panels every two weeks with a damp microfiber cloth. Dust, fingerprints, and window grime can block up to 25% of available light. If your panels face outdoors through a window, clean both sides of the glass monthly.
Seasonal adjustments matter more than you’d think. Winter sun sits lower in the sky, so tilt panels toward the light or move them to south-facing windows. In summer, you might need to shift panels slightly away from direct midday sun to prevent battery overheating.
Boost charging efficiency by placing white poster board or aluminum foil behind panels to reflect additional light onto the cells. This trick works especially well in rooms with limited sun exposure.
Rotate lights between high-sun and low-sun positions every few weeks if you have multiple fixtures. This ensures all units maintain similar charge levels and prevents one light from consistently underperforming.
If brightness drops noticeably, check the battery compartment for corrosion and verify panels aren’t shadowed by curtains or furniture that’s shifted since installation.
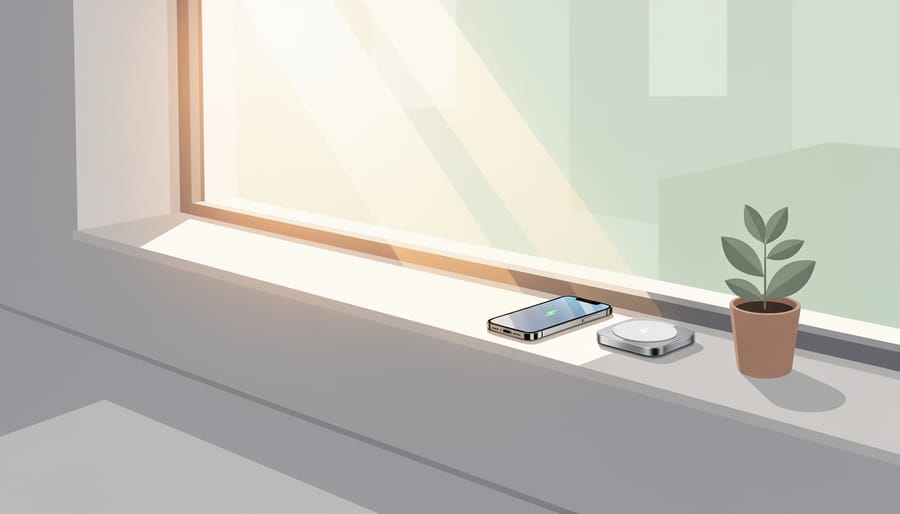
Room-by-Room Application Ideas
Living rooms benefit most from solar accent lights that create ambiance without overwhelming your space. Tuck solar fairy lights behind floating shelves or around mirror frames to add warmth that complements a neutral palette. Position small solar lamps on side tables near south-facing windows where they’ll charge during the day and provide soft evening illumination. These work particularly well in open-concept spaces where you want to define zones without hardwiring new fixtures, and they adapt easily to changes in your living room layout.
Bedrooms are ideal for solar nightlights placed on windowsills or dresser tops. The gentle glow helps you navigate at night without harsh overhead lights, and decorative solar lanterns add romantic ambiance perfect for boudoir style spaces. For reading, position a separated-panel solar lamp where the panel sits in the window but the adjustable light arm reaches your bedside. This setup costs under twenty dollars and eliminates the need for outlet access near the bed.
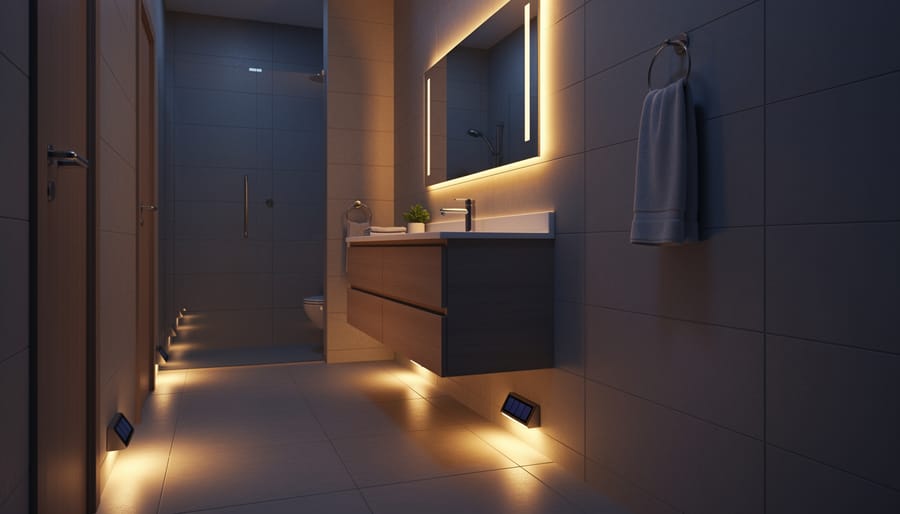
Bathrooms pair well with solar lights designed for moisture resistance. Install a solar motion-sensor light near the toilet or shower entry for safe middle-of-the-night navigation. These typically provide thirty seconds of illumination per trigger, and a single charge from a bathroom window can last several days. Just ensure any solar light you choose is rated for humid environments.
Kitchens present challenges since countertop workspace rarely aligns with window placement, but under-cabinet solar puck lights work when positioned on upper shelves near windows during the day and moved to task areas at night. This mobile approach suits renters who can’t install permanent fixtures. Alternatively, use solar pendant lights as decorative elements above islands or breakfast nooks if you have nearby window access.
Hallways and closets are perfect for solar motion-activated lights. Mount the panel in the nearest window and run the low-voltage wire to a closet ceiling or hallway corner. These lights turn on automatically when you open the door or walk past, making them incredibly practical for spaces you don’t use constantly. Expect to pay fifteen to thirty dollars per unit.
Entryways benefit from decorative solar lanterns on console tables or window ledges that charge throughout the day and welcome you home each evening with warm, welcoming light.
How to Know Your Setup Is Working
After positioning your solar lights, watch for clear signs they’re functioning correctly. A fully charged solar light should glow steadily for at least 4-6 hours after its first full day of panel exposure, if it dims after an hour or flickers constantly, your panel isn’t receiving enough direct sunlight. Test this by placing the panel in a known sunny spot (like a south-facing windowsill) for 8 hours, then moving the light to a dark space to measure how long it maintains brightness.
Within the first two days, check your panel’s surface for dust or window film interference that reduces charging efficiency. If performance drops in winter, clean panels weekly and accept shorter runtimes (2-3 hours may be normal with reduced daylight). When a light underperforms despite optimal placement, it’s time to spend smarter by investing in separated panel systems that let you mount the collector outside while keeping fixtures indoors.
Expand gradually once you’ve proven one light works reliably in your space. Seasonal maintenance means wiping panels monthly and repositioning them as the sun’s angle shifts. Consider hybrid solutions, pairing solar accent lights with plug-in task lighting, when you need guaranteed brightness for reading or detailed work but still want the flexibility and backup power solar provides.
Common Questions About Indoor Solar Lighting
Can solar lights actually charge through window glass?
Yes, solar panels can charge through clear glass windows, though they’ll collect about 25-50% less energy than they would outdoors due to the glass filtering some UV rays. Clean, south-facing windows work best, while tinted or double-paned glass reduces efficiency further.
Are indoor solar lights bright enough for reading or task work?
Most indoor solar lights provide ambient or accent lighting rather than focused task lighting, typically 10-50 lumens compared to the 300-500 lumens you’d want for reading. They work wonderfully as supplementary lighting but shouldn’t be your primary source for activities requiring bright, direct light.
How long do solar lights typically last before needing replacement?
Quality solar lights last three to five years with proper care, though the rechargeable batteries usually need replacing every 18-24 months. LED bulbs themselves can last 25,000 hours or more, so battery maintenance is your main long-term consideration.
Will solar lights still work during winter months?
They’ll work if they receive adequate sunlight, but shorter days and lower sun angles mean reduced charging time and dimmer, shorter runtime. Placing them in your sunniest windows and accepting scaled-back performance during winter is the practical approach.
The upfront cost varies widely based on quality and features. Basic decorative solar lights start around fifteen dollars, while more robust panel-and-fixture systems run fifty to one hundred dollars. Long-term savings depend on your usage, if they replace lights you’d otherwise run for three hours nightly, you might save ten to twenty dollars yearly in electricity. That’s modest, but the real value comes from placement flexibility and having backup lighting during power outages without ongoing energy costs.
You can absolutely mix solar with traditional lighting, and honestly, that’s the smartest strategy for most homes. Use solar lights where they excel, hallway nightlights, closet accent lighting, decorative touches, and stick with traditional fixtures where you need reliable brightness. This hybrid approach gives you the sustainability benefits without compromising function, and it lets you test solar lighting in small doses before committing to a larger installation.
With proper placement and realistic expectations, solar lights can absolutely enhance your indoor spaces while trimming your energy bills and reducing your carbon footprint. The key is starting small and learning what works for your home’s unique light patterns.
Begin with just one or two solar fixtures in rooms that receive strong, direct sunlight for several hours daily. A south-facing bedroom window or a bright living room nook makes an ideal testing ground. Observe how well they charge, how long they illuminate, and whether the brightness meets your needs. This experimental approach costs little upfront but teaches you volumes about your home’s solar potential.
As you gain confidence, expand strategically, add accent lighting to a hallway, try a decorative solar lamp on a sunny bookshelf, or install task lighting in a well-lit closet. Each successful addition builds a more sustainable lighting network that reflects your personal style.
The beauty of this approach lies in its flexibility. You’re not locked into expensive electrical work or committed to a single aesthetic. Solar lighting lets you blend eco-conscious living with the warm, inviting spaces you love creating. Your home can look stunning while treading lighter on the planet, and that’s a combination worth celebrating.