

Keeping appliances running smoothly and glassware crystal-clear doesn’t require expensive cleaning services or complicated maintenance plans. A handful of simple daily habits, each taking just a minute or two, prevents the breakdowns and cloudy buildup that plague busy kitchens. Rinsing dishwasher filters weekly, wiping down appliance seals after use, and loading glassware properly in the dishwasher form the foundation of a maintenance routine that extends equipment life by years while keeping your stemware looking brand-new.
The secret lies in prevention rather than repair. Hard water deposits, grease accumulation, and detergent residue cause most appliance failures and glassware cloudiness, but all three problems vanish when you catch them early. These straightforward practices cost nothing beyond the cleaning supplies you already own and fit seamlessly into the rhythm of preparing meals and cleaning up afterward. Whether you’re planning to revamp your kitchen or simply want to protect what you have, establishing these routines now saves hundreds in replacement costs and repair bills down the line.
You’ll know your system is working when appliances start faster, run quieter, and your glassware emerges spotless from every wash cycle. The habits take less time than scrolling through kitchen inspiration photos, yet deliver the kind of reliably beautiful results that make your space feel professionally maintained.
What You’ll Need: Essential Tools and Materials for Maintenance Routines
The best kitchen maintenance routines don’t require expensive specialty products or complicated equipment. Most of what you need to keep appliances humming and glassware gleaming likely sits in your pantry or under your sink right now. Starting with the basics means you can begin these protective habits today without a shopping trip or budget strain.
- Microfiber cloths (at least four): one each for counters, appliances, glassware, and general wiping
- White vinegar: cuts through mineral deposits, deodorizes, and dissolves soap film
- Baking soda: gentle abrasive for stubborn spots without scratching surfaces
- Quality dish soap: not just for dishes, works on most kitchen surfaces when diluted
- Soft-bristle brush or old toothbrush: reaches into appliance crevices and around burners
- Spray bottle: for mixing diluted cleaning solutions that you can grab quickly
- Lint-free tea towels: essential for drying glassware without leaving fibers behind
If you want to step things up slightly, Mustang Hygiene explains how dishwasher salt combats hard water that clouds both glassware and appliance interiors. An appliance-safe degreaser helps with range hoods and stovetops, though a paste of baking soda and water handles most jobs.
The real secret isn’t the products, it’s having them accessible. Store your daily maintenance supplies in a caddy under the sink or in a designated drawer so you can grab what you need in seconds. When tools are within arm’s reach, those protective two-minute routines actually happen instead of getting postponed until grime becomes a project.
Safety Warnings and What to Avoid

Before you begin any maintenance routine, take a moment to protect yourself and your appliances from potential damage. These precautions might seem obvious, but skipping them causes the majority of DIY maintenance mishaps.
Always unplug small appliances like coffee makers, toasters, and blenders before cleaning them, even if you’re just wiping the exterior. Water and electricity don’t mix, and a quick wipe-down can turn dangerous if moisture reaches electrical components while they’re plugged in. For built-in appliances like dishwashers and refrigerators, turn off the circuit breaker if you’re doing anything beyond surface cleaning.
Abrasive scrubbers and harsh chemicals might seem like shortcuts, but they’ll scratch stainless steel, etch glass, and dull the finish on everything from your stovetop to your glassware. Stick with soft microfiber cloths, non-abrasive sponges, and gentle cleaners. If you’re unsure whether a product is safe, test it on an inconspicuous spot first.
Your appliance manuals contain specific cleaning guidance that can save you from expensive mistakes. Certain dishwasher interiors shouldn’t be cleaned with vinegar, some glass types are dishwasher-safe while others aren’t, and ovens with self-cleaning features have their own rules. When you don’t have the manual, check the manufacturer’s website, most maintenance guidelines are available as free downloads. Taking five minutes to verify proper care methods beats replacing a damaged appliance or ruined glassware set.
Daily Kitchen Routines That Protect Your Appliances
Morning: Dishwasher and Coffee Maker Care
Scrape last night’s dishes before loading, food particles are the number one cause of dishwasher clogs and that lingering smell you can’t quite place. Run hot water at your sink until it’s steaming before starting the cycle. This ensures the dishwasher fills with hot water from the start, which dissolves detergent properly and prevents residue buildup on both your dishes and the machine’s interior.
Load glasses on the top rack, angled downward so water drains instead of pooling. Face dirty surfaces toward the spray arms. It sounds obvious, but poorly loaded dishes block water flow and leave spots on your glassware.
Your coffee maker needs attention every morning too. After brewing, leave the lid open so moisture evaporates, trapped dampness breeds mold and that stale coffee smell. Once a month, run equal parts white vinegar and water through a brew cycle, then two cycles with plain water. This dissolves mineral deposits that slow brewing and affect taste.
Wipe down the machine’s exterior and the counter beneath it. Coffee drips turn sticky fast, attracting dust and creating a grimy film that’s harder to remove later.
After Meals: Stovetop, Oven, and Microwave Maintenance
The five minutes you spend cleaning after cooking saves hours of scrubbing later. While surfaces are still warm but safe to touch, wipe down your stovetop with a damp cloth and a drop of dish soap. This catches grease splatters and food particles before they bake into stubborn residue that requires harsh chemicals or serious elbow grease.
For gas stovetops, lift burner grates and caps once they’ve cooled enough to handle comfortably. A quick rinse under hot water removes most debris, and a soft brush handles any stuck bits. Electric coil burners need less frequent attention, but wipe the drip pans weekly to prevent accumulated grease from smoking during your next meal.
Your microwave benefits enormously from one simple habit: always cover food with a microwave-safe lid or paper towel. This prevents splatter entirely, which is far easier than cleaning dried sauce from the ceiling. When spills do happen, wipe them immediately while the interior is still warm and the moisture hasn’t evaporated.
Ovens require patience. Let them cool for at least 30 minutes after cooking before wiping the interior with a damp cloth. Attacking a hot oven risks burns, and dramatic temperature changes can damage enamel coatings. These consistent practices complement easy-clean surfaces throughout your kitchen, creating a space that maintains its appeal with minimal effort.
Evening: Refrigerator, Sink, and Disposal Routines
Your evening kitchen routine sets the stage for a clean start tomorrow while protecting your hardest-working appliances. Spend just five minutes on these three tasks before you call it a night.
Refrigerator Check and Organization
Open your fridge and quickly rearrange items so air can circulate freely around them. Push items away from the back wall, blocked vents force your compressor to work overtime, wasting energy and shortening its lifespan. Remove any leftovers destined for tomorrow’s lunch and toss anything that’s past its prime. Wipe up spills immediately with a damp cloth; dried drips become sticky messes that harbor bacteria and create odors.
Garbage Disposal Care
Before running your disposal, turn on cold water, not hot. Cold water solidifies any fats so the blades can chop them up and flush them through. Keep the water running for 15 seconds after the grinding stops to clear the drain line completely. Never send coffee grounds, eggshells, or fibrous vegetables like celery down the disposal; these create clogs that require expensive plumber visits.
Sink and Faucet Finale
Dry your sink basin and faucet with a microfiber cloth after washing the last dish. This 30-second habit prevents hard water deposits from forming those stubborn white spots that eventually require scrubbing.
Before Bed: Final Wipe-Down and Check
A quick before-bed sweep takes less than three minutes and prevents morning chaos. Clear countertops of small appliances you won’t use overnight, this protects them from accidental bumps and gives you clean workspace in the morning. Run your hand along switches and knobs to confirm everything’s off; even a burner left on low can create safety hazards. Empty the kitchen trash, especially if it contains food scraps, to stop bacterial growth and morning odors. Lay out tomorrow’s coffee supplies or breakfast basics while surfaces are clean. This nightly reset means you’ll wake to a kitchen that’s ready to work, not one that demands immediate attention before you’ve had your first cup of coffee.
The Secret to Crystal-Clear Glassware Every Time
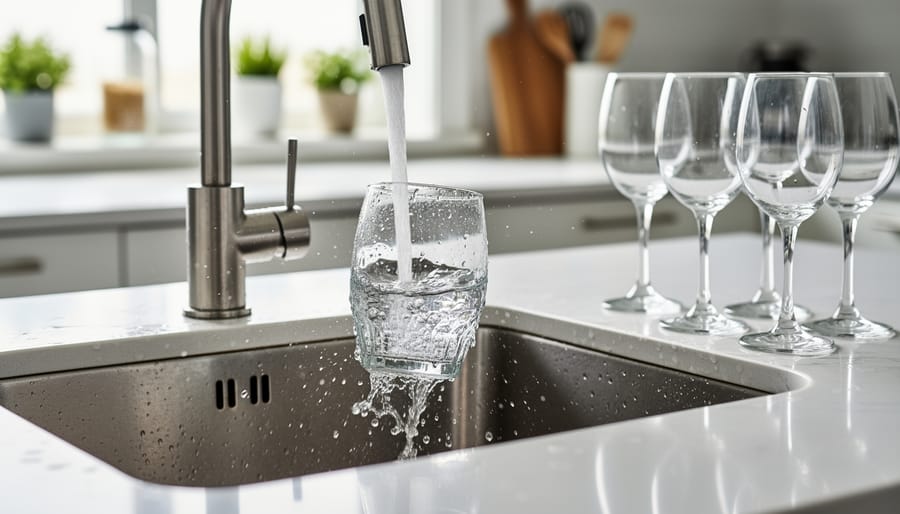
Why Glassware Gets Cloudy (And How to Prevent It)
Cloudy glassware stems from three distinct culprits, each requiring a different fix. Hard water deposits leave a white, chalky film when minerals in your water evaporate on glass surfaces. This is the easiest problem to reverse, a simple vinegar soak dissolves these mineral buildups completely.
Detergent film creates a similar cloudy appearance but feels slightly slick or soapy to the touch. Using too much dishwasher detergent or skipping rinse aid allows soap residue to cling to glasses. The good news? This washes away with proper rinsing and adjusted detergent amounts.
Etching, however, is permanent. It happens when glass reacts with alkaline dishwasher detergent at high temperatures, creating microscopic scratches that look like permanent fog. Delicate glassware, soft water, and excessive detergent accelerate etching. Once etched, the damage cannot be undone.
Prevention focuses on water temperature control, using the correct detergent amount for your water hardness, and always adding rinse aid. Hand-wash heirloom pieces in lukewarm water with mild dish soap. For everyday glasses, these adjustments keep them crystal-clear for years rather than months.
Hand-Washing and Dishwasher Best Practices
Start with warm water, not hot, when hand-washing glassware. Extreme temperatures shock the glass and increase etching risk, especially on delicate pieces. Fill your sink with water around 120°F, comfortable to the touch but still effective for cutting through residue. Add a few drops of mild dish soap, swish glasses gently, then rinse thoroughly under cool running water. This temperature transition helps prevent spotting.
For the dishwasher, always use rinse aid. It’s not optional if you want spotless glasses. Rinse aid lowers water’s surface tension, allowing it to sheet off rather than bead up and leave mineral deposits. Refill the dispenser monthly, even if you’re using detergent pods that claim to include it, the built-in dispenser works better.
Loading matters more than most people realize. Position glasses between tines, never touching each other or other dishes. Contact points create chips and prevent proper water circulation. Place them on the top rack only, tilted slightly downward so water drains instead of pooling. Avoid overcrowding; air circulation is essential for proper drying.
Hand-wash vintage glassware, anything with metallic trim, crystal pieces, and stemware with delicate bowls. These materials can’t handle dishwasher heat and harsh detergents. Take the extra two minutes, you’ll preserve their clarity and value for years. Run your dishwasher on the shortest effective cycle for everyday glasses; extended exposure to hot water and detergent accelerates clouding.
Weekly Deep-Clean Routines for Lasting Performance

While your daily routines handle surface-level maintenance, weekly tasks tackle the hidden spots where grime accumulates and efficiency drops. These deeper cleans take fifteen to twenty minutes total but prevent the kind of buildup that shortens appliance life and drives up energy costs.
Start with your dishwasher filter, most people forget it exists until drainage slows. Pull out the bottom rack, twist the cylindrical filter counterclockwise (check your manual if it’s not obvious), and rinse under hot water while brushing away trapped food particles with an old toothbrush. If it’s particularly grimy, soak it in warm water with a splash of white vinegar for ten minutes first.
Your refrigerator coils deserve attention every two weeks, especially if you have pets. These coils, usually located behind a front grille or on the back panel, release heat to keep your fridge cool. When dust and pet hair coat them, your refrigerator works harder and costs more to run. Unplug the unit, use a coil brush or vacuum attachment to gently remove the buildup, then plug it back in. You’ll likely notice the motor running less frequently afterward.
Your weekly maintenance checklist:
- Dishwasher filter: Remove, rinse, brush clean, reinstall
- Refrigerator coils: Vacuum or brush dust from coils behind grille or back panel
- Garbage disposal: Grind ice cubes and citrus peels, then flush with baking soda and vinegar
- Range hood filter: Soak in hot water with degreasing dish soap, scrub, air dry
- Oven interior: Wipe down walls and racks if you’ve had spills during the week
For the garbage disposal, toss in a handful of ice cubes and half a lemon or orange, run cold water, and grind for thirty seconds. Follow with two tablespoons of baking soda, then pour a cup of vinegar down the drain. The fizzing action scours the grinding chamber and eliminates odors naturally.
Range hood filters trap an astonishing amount of grease. Pop them out monthly, submerge in a sink filled with hot water and a few squirts of degreasing dish soap, let them soak for fifteen minutes, scrub with a soft brush, rinse thoroughly, and let them air dry completely before reinstalling.
How to Verify Your Routines Are Working
Your routines are working when your appliances run quietly and consistently, cycling on and off at their normal intervals without grinding, buzzing, or humming. Your glassware should emerge from every wash sparkling and clear, no cloudy film, water spots, or hazy buildup. Check your refrigerator door seals by closing them on a dollar bill; if it pulls out easily, the gasket may be wearing out. Appliances should start immediately when you turn them on, with no delays, flickering, or false starts.
Your kitchen should smell neutral or fresh, never musty or burnt. Open your dishwasher mid-cycle and check for proper water spray; if dishes aren’t getting clean despite regular filter cleaning, something’s wrong. Glassware that stays cloudy even after hand-washing with vinegar indicates hard water damage or etching, problems your routine can’t reverse. Keep a simple log of when you replaced filters or descaled appliances; if you’re doing this more frequently than manufacturers recommend, don’t cut corners on addressing the underlying cause. Your utility bills should remain stable; sudden spikes in water or electricity use often signal an appliance working harder than it should.
Common Questions About Kitchen Maintenance Routines
How much time do these routines actually take each day?
Most daily habits take under a minute each, wiping a stovetop right after cooking or rinsing the sink before bed adds up to about 5-10 minutes total throughout the day. Weekly tasks like cleaning the dishwasher filter or degreasing the range hood take 10-15 minutes each, but you’ll save hours by preventing major buildups that require intensive scrubbing later.
Do I really need special products, or will basic supplies work?
Basic supplies work beautifully for nearly everything. White vinegar, baking soda, dish soap, and microfiber cloths handle 90% of kitchen maintenance tasks without the expense of specialty cleaners. Save your budget for occasional descaling solutions or rinse aid if you have hard water.
What if I’m already dealing with cloudy glassware or appliance problems?
For existing hard water deposits on glassware, soak them in a 1:1 vinegar-water solution for 15 minutes before hand-washing. If cloudiness is from etching (permanent damage), prevent further deterioration by switching to gentler detergents and lower dishwasher temperatures. For appliances showing signs of neglect, start with a thorough one-time deep clean following manufacturer guidelines, then maintain with daily routines going forward.
How do I adjust these routines for a household of one versus a family of five?
Single-person households can often skip daily dishwasher runs and scale back to every other day, but should still wipe surfaces after each use. Larger families benefit from splitting tasks, one person handles after-dinner appliance wipe-downs while another manages the sink and disposal, making routines feel less overwhelming and teaching kids valuable maintenance skills early.
The beauty of these routines is their flexibility. If you miss a day, don’t abandon the whole system, just pick up where you left off. You’ll notice within two weeks that your kitchen feels more manageable, appliances respond better, and that satisfying sparkle on your glassware becomes the norm rather than a special occasion. Start with whichever habit feels easiest (many people find the evening sink wipe-down a perfect entry point), then layer in additional steps as they become automatic. The goal isn’t perfection, it’s progress that protects your investment and keeps your kitchen functioning beautifully without constant effort or expense.
These simple kitchen routines aren’t just about keeping things clean, they’re about protecting your investment and making life easier. A quick wipe after dinner takes thirty seconds but prevents a scrubbing marathon later. Running cold water with your disposal for ten extra seconds costs pennies but could save you hundreds in plumbing repairs. These small actions add up to appliances that last years longer and glassware that sparkles like new.
You don’t need to overhaul everything at once. Start with one morning habit and one evening routine. Once those feel automatic, layer in a weekly task. Within a month, you’ll notice the difference: smoother-running appliances, fewer mystery odors, and glasses you’re proud to set on the table.
The best part? You’re creating a kitchen that truly works for you, one where your morning coffee maker doesn’t sputter, your dishwasher actually cleans, and your favorite wine glasses stay crystal-clear. That’s the kind of space worth coming home to, and it’s built on nothing more complicated than showing up consistently with a cloth and a few good habits.