

You can safely clean leather car seats and furniture using a gentle pH-neutral cleaner, a microfiber cloth, and a conditioning treatment afterward. The entire process takes about 20 minutes per seat or furniture piece and requires no special skills, just careful attention to three non-negotiable rules: never soak the leather, always test your cleaner in a hidden spot first, and condition immediately after cleaning to prevent cracking.
Leather is one of those investments that rewards proper care and punishes shortcuts. Using the wrong products or techniques can strip natural oils, leave permanent water stains, or cause the finish to crack and peel. That’s exactly why cheap care costs more in the long run, turning a simple cleaning session into an expensive reupholstery job.
The beauty of this method is that it works equally well on your car’s interior and your living room sofa, giving you one reliable system for all your leather surfaces. You’ll protect your investment without buying separate products for every room or vehicle, and you’ll gain the confidence to maintain that rich, supple look leather is supposed to have. The key is understanding what leather actually needs: moisture balance, gentle dirt removal, and protection from the elements that age it prematurely.
What Car Seats and Leather Furniture Share (And Why It Matters for Cleaning)
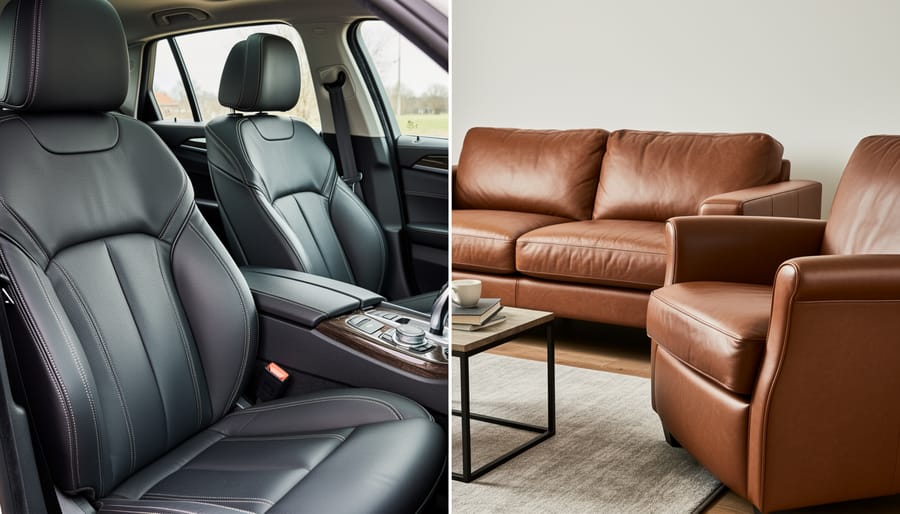
Whether you’re trying to freshen leather furniture in your dining room or clean your vehicle’s interior, you’re dealing with remarkably similar materials. Most car seats and home furniture use pigmented or semi-aniline leather that’s been treated with protective coatings. These finishes make the leather more durable, but they also create the same vulnerabilities across both applications.
Water is the primary enemy for all leather surfaces. The porous structure of leather absorbs moisture quickly, which can lead to water stains, dark spots, and eventual cracking as the material dries unevenly. Car seats face additional humidity from climate control systems, while dining chairs contend with spills and humidity from cooking areas, but the underlying risk remains identical.
Key Takeaway: Car seats and leather furniture share three critical vulnerabilities: they absorb water that causes staining and cracking, their protective finishes deteriorate from harsh cleaners, and pH-imbalanced products strip natural oils that keep leather supple. The same gentle, pH-neutral approach protects both surfaces. Using a quality car leather conditioner is essential for maintaining these surfaces properly.
Dye transfer poses another common threat. Whether it’s jeans rubbing against a car seat during your commute or dark clothing contacting a cream-colored armchair, the dye migration process is identical. Both surfaces also age similarly, developing a patina over time that requires the same careful approach to preserve character without accelerating wear.
The protective treatments applied during manufacturing, whether for automotive or residential use, respond to cleaning products in the same way. Harsh chemicals strip these finishes regardless of where the leather lives. That’s why the same approach that protects your vehicle’s seats works equally well on your living room furniture. Understanding these shared characteristics means you can master one gentle cleaning method that keeps all your leather investments looking their best for years.
What You’ll Need: Tools and Materials for Damage-Free Cleaning
Gathering the right supplies before you start prevents mid-cleaning scrambles and reduces the temptation to grab whatever’s under the sink. The good news: you need fewer items than you might think, and none of them require specialty-store hunting.
- Microfiber cloths (at least three): One for cleaning, one for rinsing, one for buffing; their soft texture won’t scratch leather surfaces
- pH-neutral leather cleaner: Prevents dye stripping and maintains the leather’s protective finish without harsh alkaline or acidic damage
- Distilled water: Eliminates mineral deposits that tap water leaves behind, especially important for light-colored leather
- Soft-bristle brush: Works into textured or perforated areas without abrading; a clean toothbrush works perfectly
- Leather conditioner: Replaces oils removed during cleaning and prevents cracking; non-negotiable for long-term protection
- Cotton swabs: Reaches tight seams and stitching details where cloths can’t fit
- Protective gloves (optional): Keeps hand oils off freshly cleaned surfaces and protects sensitive skin from prolonged cleaner contact
When shopping in 2026, read ingredient lists rather than trusting front-of-bottle claims. A true pH-neutral cleaner sits around 7 on the pH scale; anything marketed as “powerful” or “deep-cleaning” often skews alkaline and risks damage. Leather cleaners typically run $12-$25 per bottle, but one bottle handles dozens of cleaning sessions across multiple furniture pieces and car interiors.
Budget-conscious? Castile soap diluted heavily (one teaspoon per cup of distilled water) works as a substitute cleaner, though dedicated leather products offer better protection. Skip the $40 luxury conditioners; mid-range options around $15 perform just as well. You can find quality microfiber cloths in multi-packs at big-box stores for under $10, and they’re reusable for years with proper washing. The entire starter kit costs roughly $35-$50, a fraction of professional detailing fees or furniture damage repairs.
Safety Warnings: What Never to Use on Leather
Before you spray anything on your leather car seats or furniture, you need to know which common products can cause permanent damage. Many household cleaners that work on other surfaces will destroy leather’s finish, dry out its natural oils, or leave irreversible stains.
Bleach and ammonia-based cleaners top the danger list. These harsh chemicals strip protective coatings, cause discoloration that appears as lightened patches or yellowing, and break down leather fibers, leading to cracking within weeks. Even diluted, they’re too aggressive for leather’s pH-sensitive surface.
Abrasive sponges and scrub brushes scratch the finish and create a dull, damaged appearance you can’t reverse. The same goes for rough paper towels or textured rags, they might seem gentle, but repeated use wears away the protective layer leather needs.
Excess water is surprisingly destructive. Saturating leather causes water spots, warping, and stiffness as it dries. Hair dryers or other heat sources accelerate this damage, creating hard, brittle areas and deepening cracks in already-stressed leather.
Furniture polish and oil-based products leave a greasy residue that attracts dirt and prevents proper conditioning. Your leather ends up looking shinier temporarily but becomes gunky and harder to clean over time.
Even ‘natural’ solutions carry risk. Vinegar, despite its popularity in cleaning guides, is acidic enough to dull leather’s finish and dry out protective oils with repeated use. Baking soda paste can be abrasive and leave a residue in leather’s grain. To avoid damaging cleaning habits stick with pH-neutral products designed specifically for leather rather than experimenting with pantry staples.
Pre-Cleaning Prep: Test and Assess Your Leather
Before you touch any leather with cleaner, spend five minutes on these three quick checks. They’ll save you from discoloration, water stains, or worse, permanently damaged upholstery that costs hundreds to replace.
First, identify your leather type. Pigmented leather (the most common) has a uniform color and slight sheen; it’s durable and handles moisture well. Semi-aniline leather looks more natural with visible grain, accepts some water, but stains more easily. Aniline leather feels buttery soft with no protective coating, it’s gorgeous but extremely absorbent and delicate. Check your car’s manual or furniture tags for clues, or simply observe: if the surface looks perfectly even and slightly glossy, it’s likely pigmented.
Next, run the water-drop test. Place a small drop of distilled water on an inconspicuous spot, under a seat cushion or behind a car seat. Pigmented leather will bead up and sit on the surface. Semi-aniline absorbs slowly over 30 seconds. Aniline soaks in almost immediately and may darken. This tells you exactly how much moisture your leather tolerates during cleaning.
Finally, test your cleaner. Apply a tiny amount to that same hidden area, wait five minutes, then wipe and check for color transfer onto your cloth or any surface discoloration. If the leather changes color, gets sticky, or feels rough, stop, you need a gentler product. This 10-minute investment prevents ruining visible areas you can’t hide or fix affordably.
Step-by-Step: How to Clean Leather Car Seats and Furniture Safely
Step 1: Vacuum and Remove Loose Debris
Start by removing surface debris before any moisture touches the leather. Use your vacuum’s soft brush attachment or upholstery tool, never a hard plastic nozzle that could scratch the finish. Work methodically across the entire surface, paying special attention to seams, crevices, and stitching where crumbs and pet hair accumulate.
For car seats, slide the vacuum nozzle between seat cushions and along the gap where the seat meets the backrest. On furniture, don’t forget under cushions and along armrest edges. Keep the suction moderate and the attachment moving gently across the leather rather than pressing hard into it.
If you don’t have a soft brush attachment, wrap a microfiber cloth around your vacuum nozzle and secure it with a rubber band. This makeshift solution prevents accidental scratches while still pulling debris from textured leather surfaces.
Step 2: Apply Cleaner the Right Way
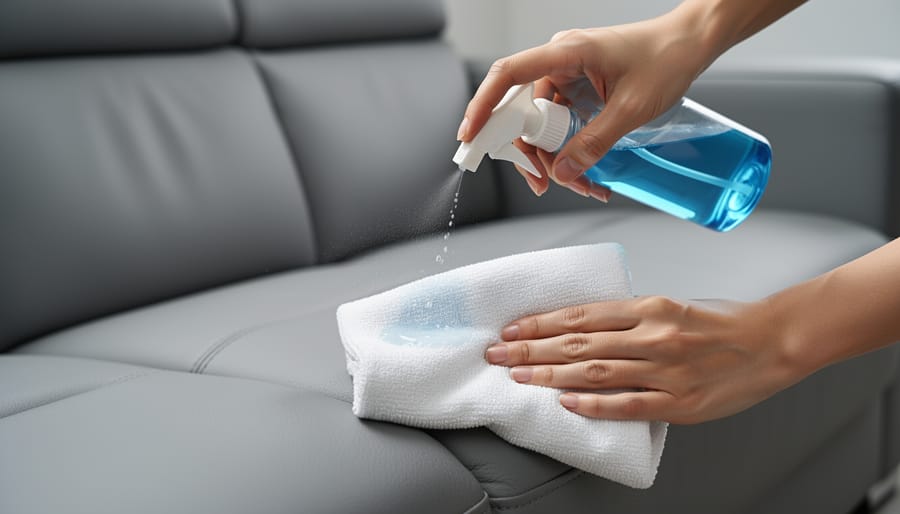
Never spray cleaner directly onto your leather surface, it pools in seams, saturates the material, and can cause permanent water marks or discoloration. Instead, lightly dampen your microfiber cloth with the pH-neutral leather cleaner. If you’re using a concentrate, follow the bottle’s dilution instructions precisely; most call for a 10:1 ratio of water to cleaner, but always check.
Work in manageable sections about two feet square, an armrest, one seat cushion, or a single car seat back. This prevents the cleaner from drying before you can wipe it away. Apply the dampened cloth using gentle circular motions, barely pressing into the leather. You’re lifting dirt, not scrubbing it into the pores.
The cloth should feel slightly moist, not wet. If you can squeeze liquid from it, you’ve used too much. Excess moisture is leather’s enemy, leading to stiffness and cracking as it dries.
Step 3: Gently Agitate Stains and Soil
Most leather stains lift with gentle cleaning, but stubborn spots need careful agitation to break them down without damaging the surface. If a stain remains after your initial wipe, reach for a soft-bristle brush, think toothbrush softness, not scrub brush firmness.
Dampen the brush slightly with your diluted leather cleaner and work in small circular motions directly over the stain. The key is letting the bristles do the work through light, repeated passes rather than aggressive scrubbing. You’re coaxing the stain out, not forcing it.
For grease spots, patience wins. Apply cleaner, let it sit for thirty seconds to break down the oil, then gently brush. Ink requires even more delicacy, blot first with a damp cloth, then use minimal brushing pressure to avoid spreading the pigment deeper into the leather’s pores.
Never press hard enough to feel resistance or see the leather change texture beneath the brush. If a stain won’t budge after three gentle passes, stop and reassess rather than risk abrading the finish.
Step 4: Wipe Clean with Minimal Moisture
Wring out your microfiber cloth until it’s barely damp, if water drips when you squeeze it, it’s too wet. Leather absorbs moisture quickly, and excess water can seep into the material, causing stains, warping, or mildew. Gently wipe over the cleaned area to lift away cleaner residue, using smooth strokes in one direction rather than circular motions. For furniture with visible grain patterns, follow those natural lines. Work in small sections, frequently flipping to a clean part of the cloth. You should be removing product, not adding moisture. If the surface looks shiny or feels damp to the touch, you’ve used too much water. Immediately buff with a dry cloth to prevent penetration.
Step 5: Dry Properly
After wiping away the cleaner, let the leather air-dry naturally at room temperature. This typically takes 30 to 60 minutes depending on humidity and how damp the surface is. Position car seats away from direct sunlight streaming through windows, and keep furniture out of bright spots that can cause uneven fading or drying. Never use a hair dryer, fan, or place items near heating vents, forced heat causes leather to crack and shrink. The surface should feel completely dry to the touch, with no cool or tacky spots, before you move on to conditioning. Patience here prevents permanent damage.
Step 6: Condition to Restore Protection
Conditioning isn’t optional, it replaces the natural oils your cleaning just stripped away, preventing cracks and premature aging. Apply a pea-sized amount of leather conditioner to a clean microfiber cloth and work it into the surface using gentle, overlapping circular motions. Cover the entire cleaned area evenly, but don’t oversaturate. Let it absorb for 3-5 minutes, then buff with a dry section of your cloth until you achieve a soft, natural sheen without residue. Condition every 3-6 months depending on use and sun exposure.
How to Verify Your Results (And Know You Haven’t Caused Damage)
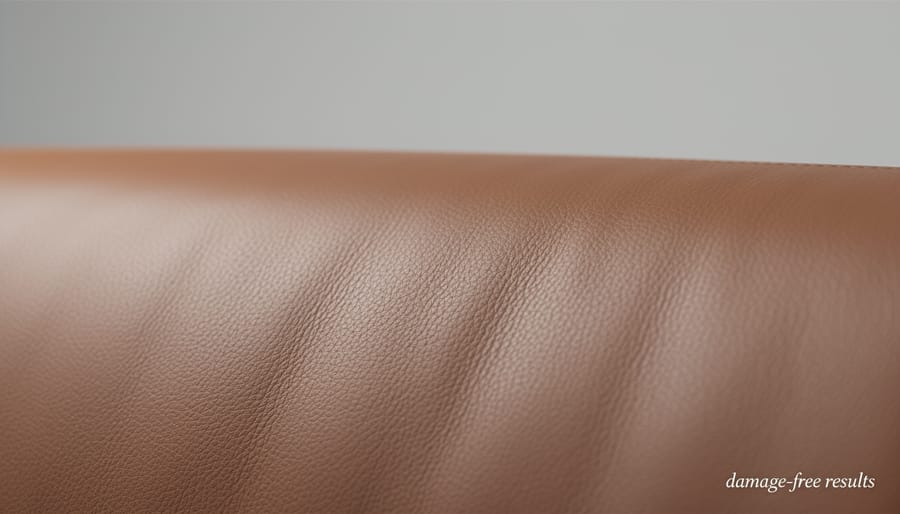
After completing all six steps, run your hand across the cleaned leather. It should feel supple and slightly soft, never sticky, tacky, or overly slick. The color should appear uniform without any lighter or darker patches where you worked. A healthy, properly cleaned leather surface has a subtle, natural sheen that catches light gently rather than looking wet or greasy.
Check seams, stitching, and any embossed patterns for residue buildup. If you see white streaks or a chalky film, you’ve left cleaner behind and need to wipe again with a barely damp cloth. Stiffness or a dry, papery texture means you’ve stripped too much natural oil and need to apply more conditioner. Work a second thin layer into those areas, let it absorb for fifteen minutes, then buff with a clean microfiber cloth to restore a luxurious finish.
If you notice cracking, deep discoloration that won’t even out, or areas where the finish has visibly lifted or peeled, stop immediately. These are signs of damage that require professional leather restoration. Similarly, if a stain has set deeper or spread during cleaning, a specialist can often salvage the piece using techniques and products not safe for DIY use.
Budget-Friendly Tips for Long-Term Leather Care
Preventing damage starts with consistent, light maintenance, far cheaper than replacing a cracked seat or reupholstering a sofa. Wipe down high-use leather surfaces with a barely-damp microfiber cloth once a week to remove body oils and dust before they become embedded stains. This 30-second habit eliminates most deep-cleaning sessions entirely.
Create a simple maintenance rhythm that spreads effort across the year:
- Weekly: Quick wipe-down of frequently touched areas with a damp cloth
- Monthly: Vacuum crevices and apply a thin layer of conditioner to dry spots
- Seasonal: Full gentle cleaning and conditioning, plus UV protection check
Position furniture away from direct sunlight and use window treatments during peak hours, sun damage causes irreversible fading and cracking that no conditioner can fix. For car seats, windshield shades make a real difference in preserving leather during summer months.
DIY conditioning solutions work if you’re careful: a 50/50 mix of white vinegar and linseed oil can nourish leather, though commercial conditioners offer more predictable results for only a few dollars more. Test homemade mixtures on hidden areas first. Whatever you choose, applying conditioner every three to four months prevents the dryness that leads to expensive cracking. Regular light care costs pennies compared to professional restoration, which starts around several hundred dollars for furniture and even more for automotive work.
Common Questions About Cleaning Leather Safely
Readers often have similar questions about leather cleaning, especially when they’re worried about damaging an expensive car interior or a cherished furniture piece. These questions reflect real concerns about balancing effective cleaning with material safety.
Can I use baby wipes on leather?
No. Baby wipes contain moisturizers, fragrances, and preservatives that leave residue on leather and can break down its protective finish over time. Stick to pH-neutral leather cleaners designed for the material.
How often should I clean my leather?
Light cleaning (dusting and quick wipe-down) every two weeks prevents buildup. Deep cleaning with a proper cleaner and conditioning should happen every three to six months for car seats, and every six to twelve months for furniture that gets less use.
What about perforated leather?
Perforated leather requires extra care since moisture can seep through the holes. Use minimal liquid, apply cleaner to your cloth rather than the surface, and avoid saturating the perforations. Pat gently rather than scrub.
Is there a difference between car and furniture leather?
Car leather often has more protective coating to withstand temperature extremes and UV exposure, but both require the same gentle cleaning approach. The core material and vulnerability to harsh chemicals remain identical.
Can old, neglected leather be saved?
In many cases, yes. Start with a thorough gentle cleaning, then apply leather conditioner multiple times over several weeks to restore moisture and flexibility. Severely cracked or peeling leather may need professional restoration or replacement.
These answers cover the situations that make homeowners hesitate before cleaning their leather. The takeaway is simple: gentle products, regular light maintenance, and patience with conditioning will handle most concerns without professional intervention. When you’re unsure about a specific situation, test your approach on a hidden spot first and watch how the leather responds before committing to the entire surface.
Whether you’re refreshing your living room sofa or detailing your vehicle’s interior, the approach stays the same: gentle products, minimal moisture, and proper conditioning. Leather doesn’t care where it lives, it responds to the same careful treatment regardless of location.
Taking thirty minutes every few months to clean and condition your leather surfaces properly costs far less than professional restoration or replacement. You’re protecting a significant investment, and the method outlined here works reliably without requiring expensive specialty products for each room.
The best part? You now have a single, proven routine that keeps all your leather looking great. No guesswork, no anxiety about causing damage, just consistent results that preserve your furniture and car seats for years. That’s budget-friendly care that actually works.