

Creating a garden workspace requires three weekend days, about $1,500 to $3,500 in materials, and a surprisingly straightforward construction process that begins with leveling a foundation and ends with a professional-looking structure that separates work from home life. Whether you’re converting a storage shed or building from scratch, the key to success lies in proper foundation preparation, weatherproofing, and running power safely to your new retreat workspace.
The remote work shift has transformed backyards into prime real estate. Garden workspaces offer what spare bedrooms and kitchen tables cannot: genuine separation from household distractions without a daily commute. These retreat workspaces typically measure between 80 and 150 square feet, large enough for a desk setup and small meeting area but compact enough to avoid most permitting headaches in residential zones.
Budget-conscious builders often start with pre-fabricated shed kits and customize them with insulation and windows, cutting costs nearly in half compared to custom builds. The construction itself follows basic carpentry principles, but the planning phase determines whether your workspace stays comfortable year-round or becomes unusable in July and January.
This guide walks you through material selection, foundation options that won’t require heavy equipment, framing techniques that accommodate both electricity and internet, and weatherproofing methods that protect your investment without professional contractor pricing. You’ll learn which steps require permits in most areas, when to call an electrician versus handling wiring yourself, and how to verify structural integrity before moving in your equipment. The process suits confident DIYers willing to learn new skills, though certain phases benefit from a helper for safety and efficiency.
What You’ll Need: Tools and Materials for Your Garden R Workspace
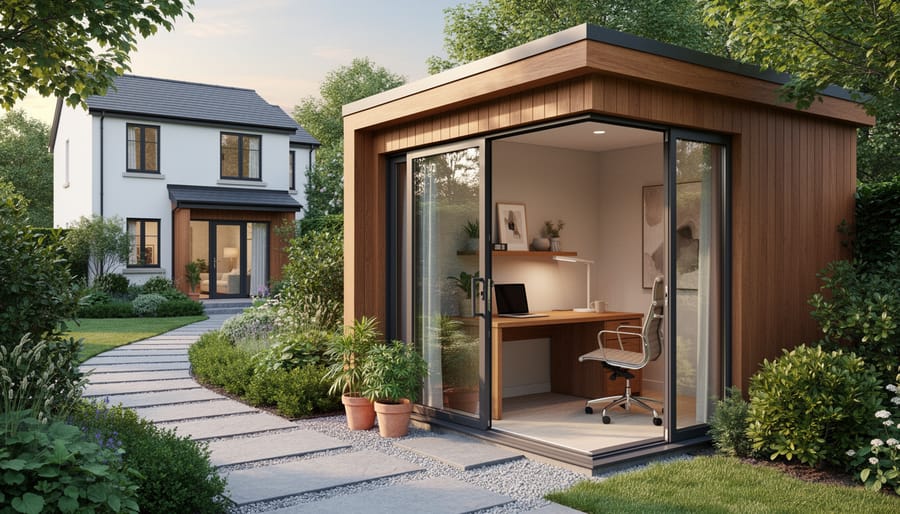
Creating an R workspace (remote retreat workspace) in your garden starts with gathering the right tools and materials. Having everything on hand before you begin helps you avoid costly mistakes and keeps your project moving smoothly. The good news? Many items can be sourced secondhand or substituted with budget-friendly alternatives without sacrificing quality.
Here’s what you’ll need, organized by construction phase:
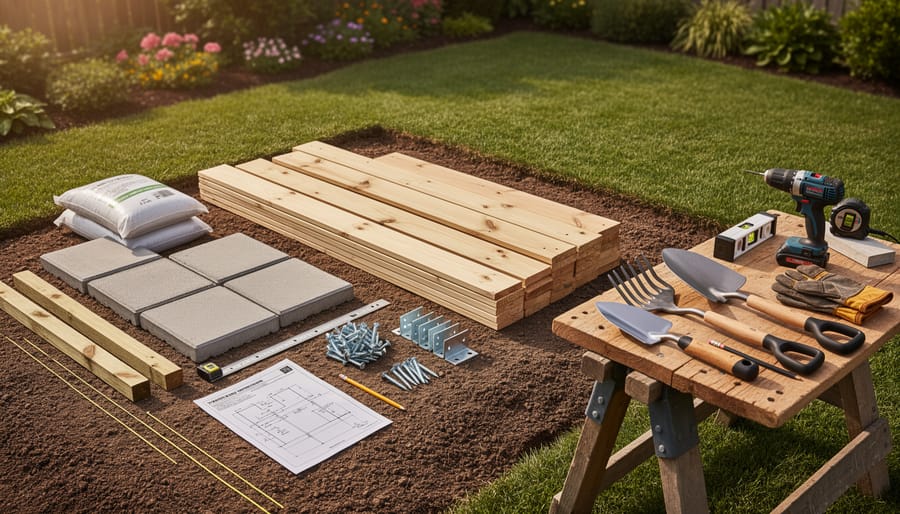
- Site Preparation: Shovel, rake, level, measuring tape, stakes and string for marking, tamper for compacting ground
- Foundation: Concrete pavers or deck blocks (budget option), gravel base material, landscape fabric, or concrete mix for a poured slab (moderate cost)
- Framing and Structure: Prefab shed kit (most budget-friendly) or lumber for custom framing (2x4s for walls, 2x6s for floor joists), corner brackets, framing nails or screws, circular saw, drill, hammer
- Walls and Roof: Exterior plywood or OSB sheathing, house wrap or weather barrier, siding material (vinyl is economical, wood offers character), roofing felt and shingles or metal panels
- Windows and Door: Pre-hung door unit, windows sized for your design (check salvage yards for deals), weatherstripping, exterior-grade caulk
- Insulation and Interior: Fiberglass batts or rigid foam boards, vapor barrier plastic sheeting, drywall or budget-friendly plywood paneling, joint compound and tape, paint or stain
- Electrical: Outdoor-rated extension cord for temporary power (immediate budget solution) or proper wiring supplies (conduit, wire, outlet boxes, breakers) if running dedicated power, solar panel kit as an alternative
- Climate Control: Portable fan and space heater (basic budget option), window AC unit (moderate), or ductless mini-split (higher investment but efficient)
- Flooring: Vinyl plank (most affordable and waterproof), laminate (mid-range), or engineered hardwood (premium look)
- Furnishing Basics: Desk (secondhand office furniture works brilliantly), ergonomic chair, shelving or storage cabinets, task lighting, power strip
Look for secondhand bargains on windows, doors, lighting fixtures, and furniture through online marketplaces or architectural salvage stores. These items often cost half the retail price and add unique character. Buy new for structural lumber, insulation, and weatherproofing materials where quality directly impacts your workspace’s longevity and comfort. A well-planned shopping list matching your specific design keeps costs predictable and your build on track.
Important Safety and Legal Considerations Before You Build
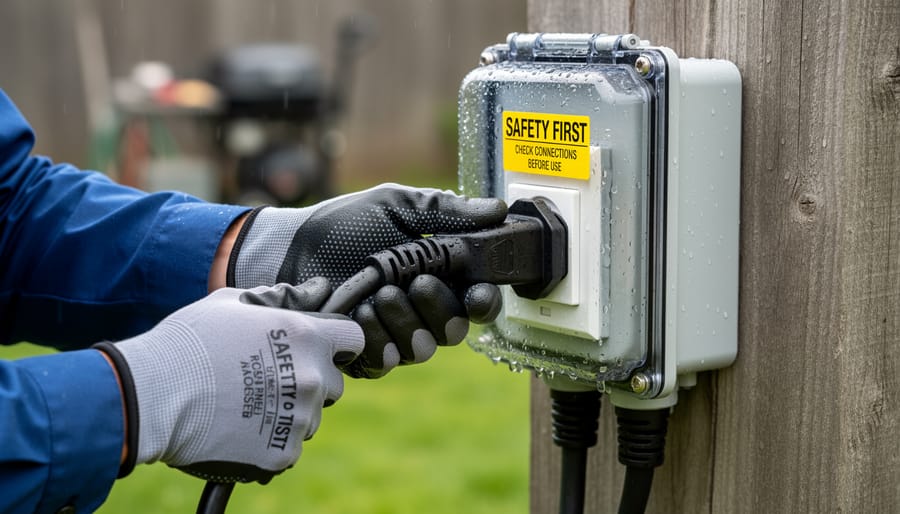
Before you start building your garden r workspace, understanding safety and legal requirements will save you time, money, and potential headaches. Skipping these steps can lead to fines, insurance complications, or structural failures that cost far more than doing it right from the start.
Check with your local planning department about permits for sheds and accessory structures before ordering materials. Many areas allow structures under 120 square feet without permits, but rules vary widely. Some municipalities require permits for anything with electrical service, regardless of size. Your homeowners association may have additional restrictions on building placement, exterior colors, or maximum heights that aren’t covered by city codes.
Foundation requirements depend heavily on your local climate and soil type. In areas with freezing winters, shallow foundations can suffer from frost heave foundation problems that crack walls and misalign doors. Clay soil expands and contracts with moisture, while sandy soil drains well but offers less stability. A local contractor can assess your specific conditions for around $100, potentially saving you from expensive repairs later.
Contact your insurance provider before construction. Some policies require notification for new structures, and adding coverage for your r workspace typically costs $50-150 annually. If you’re running electrical service from your main house, hire a licensed electrician for that work. Many jurisdictions allow homeowners to do interior electrical themselves once the main line is professionally installed, but check local codes first.
For weatherproofing in areas with heavy rain or snow, ensure your structure meets local wind load and snow load requirements. A workspace that collapses under a typical winter storm isn’t budget-friendly, regardless of initial savings.
Step-by-Step: Creating Your Garden R Workspace
Planning Your Layout and Choosing the Location
Walk your garden at different times of day before you commit to a location. The best spot for your R workspace balances several practical needs.
Start with sunlight. Morning light from the east energizes without overheating, while south-facing positions offer consistent brightness year-round. Avoid full afternoon western sun unless you plan substantial shading, it’ll turn your workspace into a sauna by 3 PM.
Check your WiFi signal strength by taking your phone to potential locations. Most routers reach 150 feet outdoors, but walls and vegetation weaken the signal. If you’re beyond reliable range, budget for a WiFi extender or plan to run ethernet cable.
Power access matters too. Measure the distance to your nearest outdoor outlet or your main electrical panel. Running power more than 50 feet gets expensive quickly, though solar setups can work for basic lighting and laptop charging.
Consider privacy from neighbors and sightlines from your house. You want separation without complete isolation. Position windows to capture garden views while avoiding direct stares into neighboring properties.
Once you’ve chosen your spot, mark the footprint with stakes and string. Walk around it, sit where your desk will go, and visualize the space. This is your last chance to adjust before breaking ground.
Preparing the Foundation
Your foundation choice directly impacts both cost and longevity. For a budget-friendly approach, concrete pavers on a compacted gravel bed work beautifully for smaller r workspaces, expect to spend around $200-400 for an 8×10 space. Arrange pavers in a grid pattern on 2-3 inches of leveled gravel, ensuring proper drainage away from your structure.
Deck blocks offer a middle ground at $300-600, raising your workspace off the ground while allowing air circulation underneath. They’re ideal if you’re using a prefab shed kit and need something quick to install on reasonably level ground.
A full concrete slab provides the most stability for year-round use but runs $800-2000 depending on size. This makes sense if you’re planning permanent electrical work or want to eliminate any flex in your floor.
Whichever option you choose, invest time in leveling. Use a long 2×4 and spirit level across multiple directions, even a half-inch slope over eight feet can cause door problems and water pooling. For proper drainage, grade the surrounding soil slightly away from your foundation. In clay-heavy soil, consider adding a French drain along one side to prevent water accumulation during heavy rain. Your garden workspace will only be as solid as what sits beneath it.
Building the Frame and Walls
Start with your frame: if you’re using a prefab shed kit, follow the manufacturer’s assembly instructions carefully, most use labeled panels that slot together without needing advanced carpentry skills. Budget kits from big-box stores typically run £800, £1,500 and include pre-cut framing, walls, and roof panels. For custom builds, construct a simple stud frame using 2×4 timber on 16-inch centers, securing it to your foundation with appropriate brackets.
Position windows and doors early in the framing process, not as an afterthought. Place your largest window facing away from direct afternoon sun to avoid glare on screens, and consider a second window on an adjacent wall for cross-ventilation. A standard 3×2-foot window costs £60, £150, while reclaimed options can be £20, £40. Door placement should feel natural from your garden path, you don’t want to navigate obstacles every time you head to work.
Before closing up walls, install insulation between studs. Rockwool batts (£30, £40 per pack) offer excellent thermal and sound insulation for R workspaces where you’ll take video calls. Cheaper fiberglass works but requires gloves and masks during installation. Wrap the exterior in breathable membrane (£50 for a roll) before adding your chosen cladding, this weatherproofing step prevents moisture damage that would undermine your entire build. Seal all gaps around windows and doors with expanding foam.
Installing Electrical and Climate Control
Running power to your garden workspace starts with evaluating your options. If your workspace sits within 100 feet of your house, you can typically run an underground electrical line using outdoor-rated cable in conduit, a moderate-cost option that requires hiring a licensed electrician for safety and code compliance. For budget-conscious builders, solar panels paired with a battery system offer an off-grid alternative that eliminates trenching costs, though initial setup runs higher. A basic 400-watt solar kit can power lighting and charge devices, while larger 1000-watt systems handle multiple monitors and small appliances.
Climate control doesn’t require breaking the bank. For summer comfort, ceiling fans cost under £50 and dramatically improve air circulation, while a portable air conditioner provides cooling for £200-£400. Winter warmth comes from oil-filled radiators or ceramic space heaters starting around £30, though energy efficient heating like infrared panels offer better long-term running costs. Mid-range budgets accommodate mini-split systems (£800-£1,500 installed) that heat and cool year-round with excellent efficiency.
Lighting placement determines workspace functionality. Position overhead LED panels or track lighting directly above your desk to eliminate screen glare, supplemented by adjustable task lamps for detailed work. Warm-white bulbs (3000K) create comfortable ambiance for video calls, while daylight bulbs (5000K) reduce eye strain during long sessions.
Interior Finishing and Furnishing
With your garden workspace framed and weatherproofed, it’s time to turn that shell into a retreat that actually works. Start with walls: paint is the budget champion here. A neutral palette like soft whites, warm grays, or gentle beiges keeps the space calm and professional while making it feel larger. For texture without the price tag, try shiplap panels from a home improvement store or even peel-and-stick wallpaper on one accent wall behind your desk. These add character without complex installation.
Flooring ranges widely in cost. Vinyl plank flooring starts around one dollar per square foot, installs without glue in most cases, and handles temperature shifts better than hardwood. Mid-range laminate offers more realistic wood looks, while luxury vinyl or engineered hardwood creates a high-end feel if budget allows. Add an area rug under your desk zone for warmth and sound absorption.
Desk placement matters enormously. Position your workspace perpendicular to the largest window rather than facing it directly, which prevents screen glare while keeping natural light on your task. This setup also gives you garden views when you glance up. Wall-mounted shelves and floating desks help maximize small space while a flexible seating layout with a task chair plus a reading chair in the corner makes the workspace adaptable for different work modes. Vertical storage keeps supplies organized without eating floor space, and bringing in one or two potted plants bridges the gap between your professional workspace and the garden just outside.
Testing Your R Workspace: How to Know It’s Ready to Use
Before you move your laptop and settle into your new garden R workspace, a thorough verification process ensures you’re stepping into a safe, comfortable retreat that truly works for full-time use. Think of this as your pre-launch checklist, catching issues now saves frustration and potential hazards down the line.
Start with structural soundness. Walk the perimeter and check that all walls feel secure without wobbling. Inspect corners and joints for gaps, test that doors and windows open and close smoothly without sticking, and verify that the floor feels level and solid underfoot. Look up at the ceiling and roof for any signs of sagging or water marks that might indicate a problem with your build.
Weatherproofing deserves serious attention. Run a hose over the roof and walls for at least 20 minutes while someone stays inside watching for leaks. Check around windows, doors, and any penetrations where electrical lines enter. On a windy day, hold a lit candle near seams and watch for flickering that indicates drafts you’ll need to seal.
For electrical safety, test every outlet with a circuit tester (available for under £10) to confirm proper grounding. Plug in your computer, monitor, phone charger, and any other devices you’ll use simultaneously to ensure circuits handle the load without tripping. If you’ve installed overhead lighting, run it for several hours to check for flickering or overheating.
Climate comfort requires patience. Spend an entire working day in the space during typical weather for your area. Note if you’re too cold in the morning, too hot by afternoon, or if humidity makes the space stuffy. This eight-hour test reveals whether your heating, cooling, and ventilation actually work for sustained use or need adjustment.
WiFi connectivity often surprises people, signal strength that seems fine on your phone might not support video calls or large file uploads. Run a speed test from your planned desk location, join a video meeting, and stream music while working to simulate real conditions. If connectivity lags, you might need a WiFi extender or to reposition your router.
Finally, evaluate workspace ergonomics by working a full day as you normally would. Is your desk at the right height? Does sunlight create screen glare at certain times? Can you reach power outlets without awkward stretching? Your body will tell you what needs tweaking before the space feels truly functional.
Make a punch list of any issues you discover, prioritize safety fixes first, then comfort improvements. Once everything checks out and you’ve spent a productive day without problems, your garden R workspace is genuinely ready for daily use.
Common Questions About Garden R Workspaces
How much does it cost to build an R workspace in the garden?
Budget builds using converted sheds or simple structures start around $1,500, $3,000 for materials, while custom-built insulated workspaces typically run $5,000, $15,000 depending on size and finishes. Electrical work adds $500, $2,000 unless you use solar options, and furnishing costs vary widely based on whether you buy new or repurpose existing pieces.
Do I always need a permit for a garden R workspace?
Not always, many areas allow small structures under 120 square feet without permits, though electrical work typically requires inspection. Check your local zoning office and HOA rules before starting, as requirements vary significantly by location and whether you’re adding permanent foundations.
Can I use my garden R workspace year-round?
Yes, with proper insulation and climate control. Budget-conscious solutions like weather stripping, thermal curtains, and a small space heater handle mild climates, while areas with extreme temperatures benefit from mini-split systems and upgraded insulation. Plan for heating and cooling costs when budgeting.
How long does it take to build a garden R workspace yourself?
Most DIY builds take two to four weekends for the basic structure, plus additional time for electrical work, finishing, and furnishing. Converting a prefab shed can be done in a long weekend, while custom builds from scratch stretch to four to six weeks working part-time.
The maintenance needs for garden R workspaces stay minimal if you build with weather-resistant materials. Expect to reseal wood surfaces every two years, check weatherstripping annually, and clear gutters or drainage paths seasonally. Most owners spend a day or two per year on upkeep, similar to maintaining a quality shed.
Whether to DIY or hire professionals depends on your skill level and the scope. Many homeowners handle the basic structure and finishing themselves while bringing in licensed electricians for power installation, which keeps costs down while ensuring safety. If you’re comfortable with basic carpentry and following building plans, you can tackle most of the project solo or with a helper.
These retreat workspaces often add value to your property, particularly in markets where remote work remains common. Real estate agents note that functional outdoor structures appeal to buyers seeking home office solutions, though the return varies by location and build quality. Focus first on creating a space that serves your needs, any property value boost becomes a bonus rather than the primary goal.
Creating your own garden R workspace is more achievable than you might think, whether you’re working with a modest budget and repurposed materials or investing in a more polished retreat. The real luxury isn’t in the price tag, it’s in having a dedicated space just steps from your back door where you can focus, create, and separate work from home life without a commute.
You’ve now got the roadmap, from selecting your site and laying the foundation to finishing touches that make the space truly yours. The work involved is significant, but it’s the kind of satisfying project where you’ll see tangible progress each weekend. Many builders find the process itself rewarding, knowing they’re crafting something tailored exactly to their needs.
Once your workspace is up and running, take time to personalize it with plants, artwork, or whatever inspires you. Equally important: establish clear boundaries with yourself and your household about when you’re “at work” versus home. That physical separation you’ve built deserves mental separation too. Your garden R workspace isn’t just about productivity, it’s about reclaiming balance and creating a retreat that supports both your professional goals and your wellbeing.
How to Clean Car Seats and Leather Furniture Without Damage (Safe Methods for Any Room)
Creating a garden workspace requires three weekend days, about $1,500 to $3,500 in materials, and a surprisingly straightforward construction process that begins with leveling a foundation and ends with a professional-looking structure that separates work from home life. Whether you’re converting a storage shed or building from scratch, the key to success lies in proper foundation preparation, weatherproofing, and running power safely to your new retreat workspace. The remote work shift has transformed backyards into prime real estate. <a href="https://www.home-and-bedroom.com/ways-to-create-a-workspace-in-your-garden/">Garden...